Coin Bank x Pin Cushion x Earring Holder x Wish Jar
7:01 AM
Coins are very cool.
Not only can they be saved up to purchase other cool things, but they are awesome symbols of history, nationality, and hard work.
I remember a time when I was younger, cleaning my bedroom with the help of my father. We used a dustpan and broom to collect the miscellaneous debris we had carefully assembled into a pile. With a sweep of the broom, I proudly gathered the trash into the dustpan. As I went to empty the pan, my dad stopped and scolded me for throwing away loose change. I always thought that pennies were insignificant, but that day I learned a lifelong lesson: money is money, and every cent counts.
Later that night, he took me down to the garage and showed me his collection of coins, mostly pennies. My eyes widened as I looked at the three large, glass containers before me, filled to the top with American coins and Haitian gourdes he saved from home. I thought it was the coolest thing ever, and from that day on, I never threw away another penny.
At my previous job, I overheard a woman talking about what her family does with their loose change. She said that after they came home from anywhere, they would empty the change from their wallets into a jar. Everyone. Everyday. After a year, they had $800 saved up, and the whole family was able to go on a cruise.
These stories were the inspiration behind this project.
This tutorial will teach you how up cycle a salsa jar into a Deco Coin Bank.
TIME: This project took me a couple of days to do, because I did a little over a period of time, but it could be completed in a couple of hours if done nonstop.
WHAT YOU NEED:


*Old Jar
*Paint
*Puffy Paint
*Silicone Bathroom Caulk
You can find this at your hardware store for around $5.
*Random Charms
*Scissors
*Tape
1. Use soap and water to clean any remaining food from the jar.
2. Peel the label from the jar.

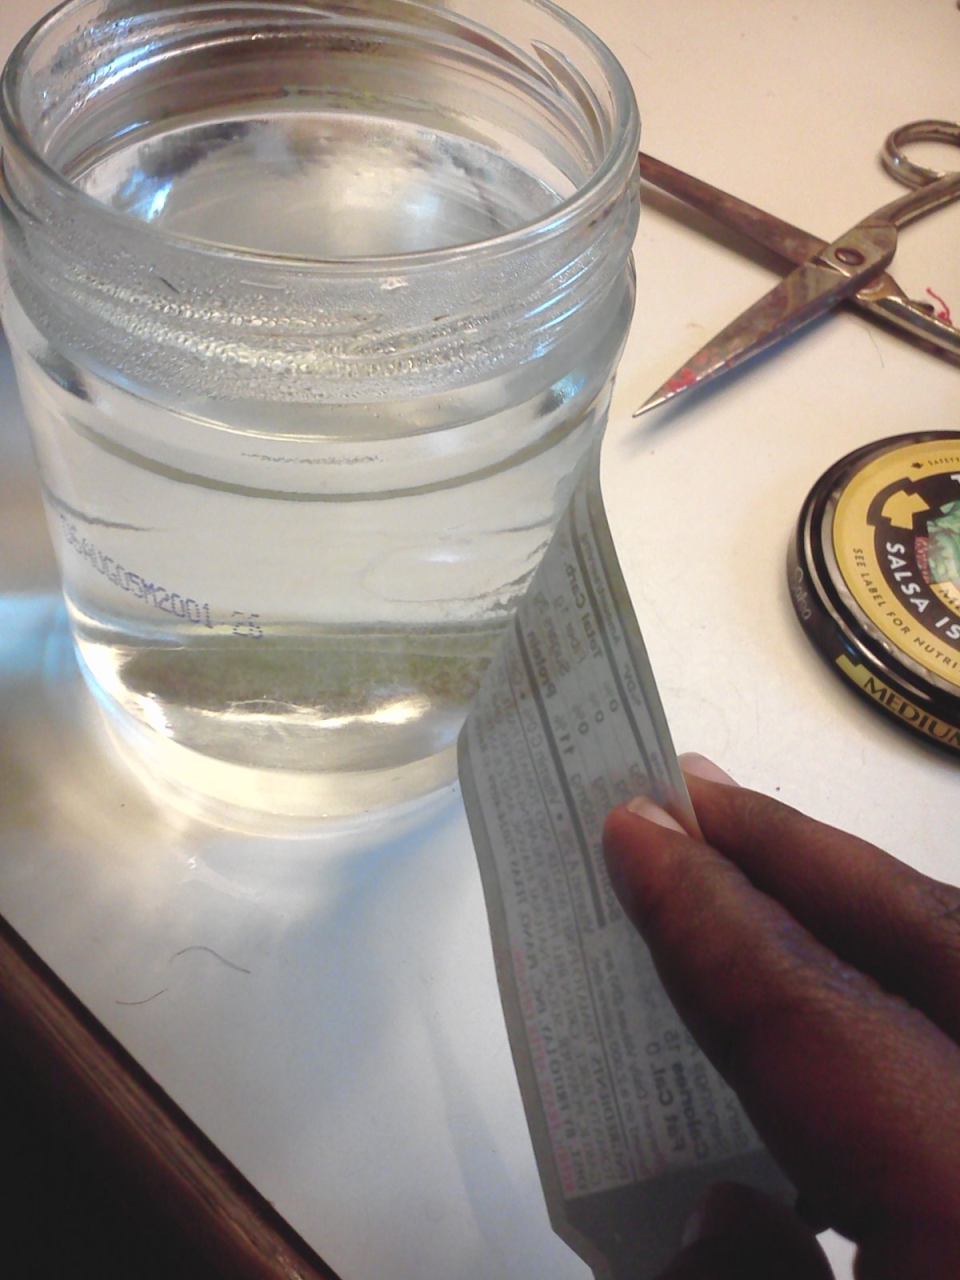
The best way to do this is to boil hot water and pour it inside the jar and let it sit for about three minutes.
The hot water will melt the glue, and the paper can be removed mess free!
3. To remove any excess glue from the outside, pour the hot water into a large bowl, add a little soap, and let the jar sit inside for a bit. Use your fingertips to rub away any glue.

4. Dry the jar with a towel.
5. Use a quarter and a Sharpie to measure the length of the coin slit you are about to cut.
 |
| If you plan on saving quarter-dollars, use that to measure the cut, since they are larger. |

7. Test it! Try pushing a quarter through the whole. If it doesn't go through, go back and make the hole bigger, little by little. If you go too fast, it might end up way too big, or you might end up hurting yourself.
 |
| If your quarter gets jammed, take a step back. Do not pass Go. Do not collect $200. |
DECO TIME
8. Tape a straight line around the circumference of the jar on the top and the bottom. The middle space is going to be painted.
 |
| I apologize for using invisible tape, once I paint it, you will be better able to see. |
 |
| Do you have a favorite t-shirt that is now a hot mess but don't want to necessarily get rid of it? Cut it up to form the band and apply with hot glue! WHILE THAT IS DRYING |
 |
11. With any project, before you glue anything down, you want to configure the arrangement first. Play around with it! Usually it takes me a couple of tries before I find what I like.
 |
| Very important! Once you decide on the arrangement you want, snap a picture! Use it as a guide when applying your charms, it really helps! |
12. When your first coat of paint is dry, go ahead and lay on a second coat. Once that is dry, grab a bottle of clear nail polish and set the top coat.
 |
| I did two layers of turquoise, two layers of clear. |
 |
| Not gonna lie, this is always one of my favorite things to do... |
 |
| It's also great to tape if you live with folks who have sticky fingers. |
 |
| I cut diagonal slits about 1/2" apart from each other and then pressed them down so that they sit flat. |
14. Grab your bottle of silicone. Use a craft knife or blade to cut V-shaped slits so that it looks like a cake icing tip. Bend the tips inwards.

 |
| Before you turn into a piping machine, ALWAYS practice on a napkin first. EVERY TIME. Sometimes it dries and clogs, and when you go to decorate, it explodes everywhere. No bueno. |
15. Once you have your technique down, start piping!
DO NOT COVER THE ENTIRE SURFACE!!
Do enough for a charm or two because the silicone sets pretty quickly.
 |
| Start with the slot. |
 |
| Take your time, go in rows. |
 |
| `*`~charming~`*` |
 |
| Once you start using a lot of silicone push it all forward and roll the tip down to keep air out. |
 |
| Coming along. |
 |
| Go around the edge to make it look neater. |


 |
| Do the side. |
 |
| I added pearls from a broken necklace for extra drama, of course. |
PUFFY PAINT TIME
16. Grab a bottle of your favorite Puffy Paint colors and get down.
 |
| Are you saving up for your dream car? New shoes? The iPhone 12? Write it down! Having a daily reminder of what you are saving up for makes it easier to stay on track.  |
 |
| Dirty Jobs a la Claudine Julien. |

One of the things I love most about Puffy Paint is that it is very easy to manipulate. If you don't like the way something turns out, you can peel it off and start over once it dries. If you make a mistake, wipe it clean while it is still wet!


Be careful not to smudge the paint while it is still wet, like i did a bunch of times. If you do, just wipe it clean and start over.
 |
| ;( |
Here is my completed jar:


"Saving up for Cabo"
After having it on my desk for a couple of days, I have realized that it actually has multiple uses:
 |
| Pin/Needle Cushion |
 |
| Earring Holder |
 |
| Wish Jar - For every dollar that I put in, I write something that will be a positive outcome of saving up. What will you come up with? Thank You for Loving Your Mother. Thank You for Doing It Yourself.
Claudine
|


0 comments